Microsoft PowerPoint
Microsoft PowerPoint is a professional presentation program that allows the user to create "presentation slides" that can be displayed on the computer screen or through a projector that is plugged into the computer. A PowerPoint presentation is a good way to convey pieces of information, usually in the form of an outline, to a large audience. Generally, PowerPoint presentations are appealing to users because they are easy to create and edit and generally small enough to fit onto a CD or a USB Jump Drive.
Therefore, a user does not have to carry around any slides or slide projector, and, if necessary, can make any last-minute changes to the presentation.
Today, we will be using Microsoft PowerPoint 2021 to explore the program.
Microsoft PowerPoint Components
Before you get started with Microsoft PowerPoint (commonly referred
to as simply PowerPoint), you will need to locate and open it from the
computer. It may be on your desktop. From the computer desktop:
1. Double-click
on the MS PowerPoint icon![]()
If the MS PowerPoint icon is not on the desktop, go to the Start menu:
1. Click Start ►Programs ►Microsoft PowerPoint*
*Occasionally, Microsoft PowerPoint will be in a folder called “Microsoft Office” or similar – this will make one more step between “Programs” and “Microsoft PowerPoint.”
MS PowerPoint will open a blank page called “Presentation1.”
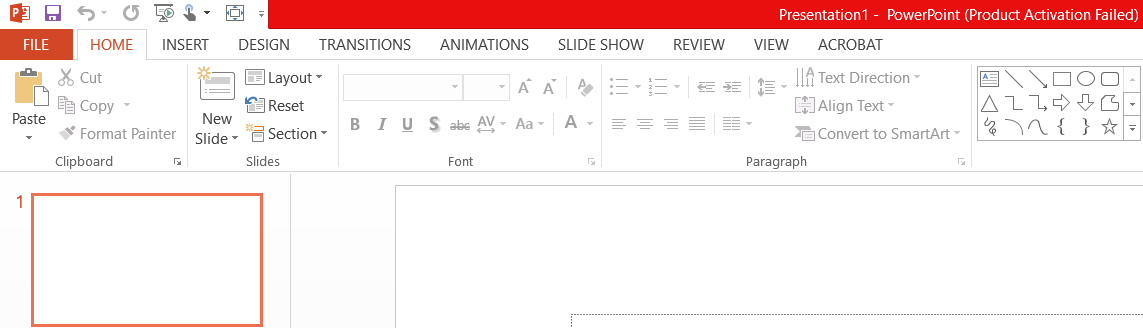
This is an image of the upper-left corner of MS Word.
This box features two important bits of information: which file you are currently working on (in this case, “Presentation1” since we have not yet renamed it) and which program you are using (in this case, “Microsoft PowerPoint.”).
Notice the default title "Presentation1." You will get a chance to rename your presentation slides the first time you choose to save it.
Using the Browser’s Toolbar
This is a close-up view of the Title Bar, where file information is located.

Notice the three buttons on the right side, controlling program features. Remember that the X button on the far right means close the program, the middle button is a toggle switch between full screen and a small window, and the single line button on the left means minimize to the task bar.
Menu Bar

The Menu Bar is a common site in almost all Microsoft Windows programs. It features text-based menus, on which are listed virtually every option available to the user in the entire program. Each menu expands when clicked (with the left mouse button), offering many options categorized by specific tasks.
You can click on each of the words to see a menu of the tasks you can perform.
To see a menu:
1. Point with your mouse to a menu option.
2. Click the left mouse button once to open a drop-down menu.
3. Point with your mouse to a particular item.
4. Click once with the left mouse button to select the item.
The Standard Toolbar

Toolbars provide “shortcuts” to commands also found in the Menu Bar. Toolbars are
usually located just below the Menu Bar, and exist to offer another way to perform the same task. As with all Microsoft Windows programs, there are usually three ways in which to perform every task in order to suit the user’s preferences.
Remember, if you can’t remember what an icon stands for, hover your mouse over it and a box will pop up with the explanation!
The most commonly used commands in PowerPoint are also the most accessible. Some of these commands are:

The Formatting Toolbar (Home)

The Formatting Toolbar offers options that can change the font, size, color, alignment, organization, and style of the text in the presentation slides. For example, (starting from the left side of the Toolbar) the “Arial” indicates the FONT of your text; the “32” indicates the SIZE of your text; and so on.
This toolbar works the exact same way as the MS Word Formatting Toolbar. The main difference is that the format changes will only affect the text box in which you are currently working. All other text boxes will remain in the default setting ("Arial" font, size "32").
The Drawing Toolbar (Insert)

There may also be a Drawing Toolbar on your screen. (If not, you can go to View ►Toolbars and click on “Drawing” to make it appear). Many of the things we are going to do today through the menus have shortcuts on this toolbar. Remember, if you can’t recall what an icon stands for, hover your mouse over it and a box will pop up with the explanation!
Design
Two additional shortcut icons appear on the MS PowerPoint toolbar: the Design icon and the New Slide icon. Both commands are frequently used, and it is good to be familiar with their location on the toolbar.
The Design icon is a shortcut to the slide design page. Here you will be able to create and edit the appearance of your slide(s).
The New Slide icon automatically adds a new, blank slide for you to work on. You can keep track of the slides you have already worked on in the Slide Outline box on the left-hand side of the screen. You can access a slide at any time by clicking on it with your mouse through this screen.
One of the more popular features of MS PowerPoint is that it gives the user a wide variety of design choices. At some point, you may wish to change the design and color of the background for your slides. To do so, simply click on the Design icon:
On the right-hand side of your screen will appear the "Slide
Design" pane. Here, you are given three design options to apply to your
slides.

Design Templates: Here is a list of over 20 templates that you can choose from to apply to the background of your slides. For each template, you have the option of applying the design to all slides or to only the selected slide. You can view these options by clicking on the arrow on the right side of the template. (You can also design your own background, but we will cover this in the PowerPoint 102 class.)
- Color Schemes: This option gives you a variety of color schemes to choose from to apply to your selected design template.
- Animation Schemes: This option will allow you to select different types of animation that can be applied to either all the slides or selected slides. The animation schemes are different ways the slides are "introduced" to your audience, such as "faded wipe" or pinwheel."
Slide Layout
The default in PowerPoint for each new slide is to have a Title text box and a Text text box. As discussed earlier, you do have the option of rearranging the text boxes to fit any layout you have in mind. However, it is often easier to select a layout that fits your needs rather than reformatting the default layout for each slide.
To choose a slide layout,
Select Format ► Slide Layout from the Menu Bar. On the right-hand side of your screen will appear the "Slide Layout" pane.
From here, you have the option of applying a slide layout either to a selected slide or to a new slide that has yet to be inserted. You can view these options by clicking on the arrow on the right side of the template.
Note the four different types of layout categories.
Text Layout: These options are for choosing a layout in which you are only organizing different text boxes. There are no spaces for pictures, charts, or graphs.
Content Layout: These options are for choosing a layout that will only contain pictures, charts, or graphs. There are no spaces for text boxes.
Text and Content Layout: These options have room for both text boxes and pictures/charts/graphs.
Other Layouts: These are designed for other media content such as video clips or audio tracks.
Text Boxes
Text Boxes are "designated" areas that allow you to type words, sentences, and bullet points into the slide. You can adjust the size and placement of the text box within any given slide. It is also possible to have multiple text boxes per slide.
When you first open MS PowerPoint there will automatically be two text boxes on the slide; "Click to add title" and "Click to add subtitle." These text boxes already have a preset format applied to them. The "title" box has a font size of "44" while the "subtitle" box has a font size of "32."
You can change the text format of any box at anytime by adjusting the format settings on the Formatting Toolbar.
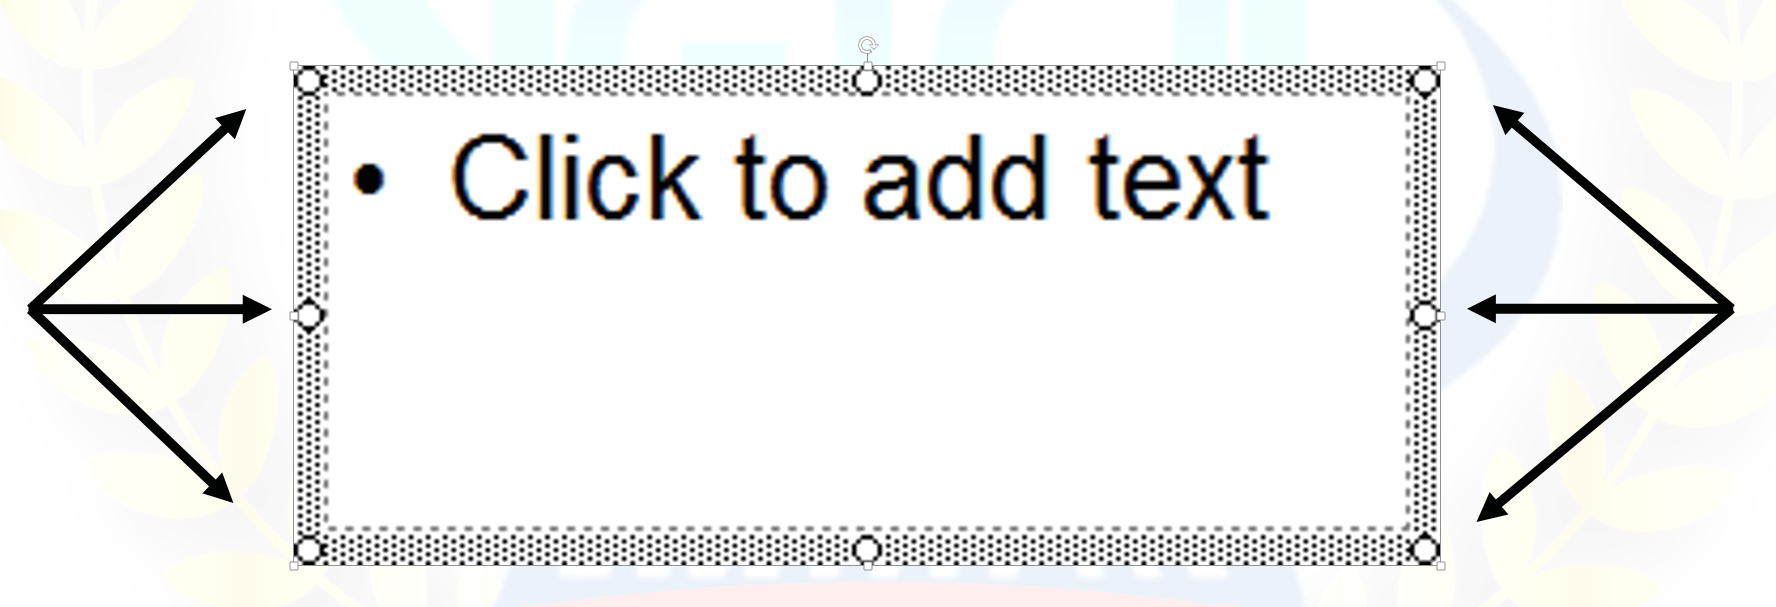
To adjust the size of the text box, first click on the text box. Notice the change in border. Once you have clicked on a text box, the border of the box becomes thicker and little circles appear on the corners and at the midpoints of the box.
Move the mouse pointer over any one of the circles. Notice that the mouse pointer will change to either ↔ or ↕. Click and hold down the left mouse button. To adjust the height, move the mouse up or down; to adjust the width, move the mouse left or right. Note that the corner circles can adjust both height and width, while the mid-point circles can only adjust either height or width.
To move the text box to a different location on the slide, move your mouse pointer over any part of the thick, gray box outline. Notice the change in your mouse pointer (it will look something like a "plus" sign (+) with arrows). Click and hold down the left button on your mouse. You can now drag the text box to any position on slide by simply moving your mouse.
To write in a text box, simply click inside the box with your mouse. When a cursor is flashing, you are ready to type.
You can also add a text box (or an additional text box) to any slide
at any time! Use your mouse to click Insert
►Text Box and then “click and
drag” your mouse on the slide in the area you want the text box to appear. (On
the Design Toolbar - the “Insert Text Box” button looks like)
Pictures
Inserting a picture into MS PowerPoint is very similar to inserting a picture into MS Word.
1. Select the slide that you wish to add the picture to.
2. From the Menu Bar, select Insert ► Picture ► From File (or Clip Art).
3. Choose the picture you wish to insert and select "Insert."
*Note: The picture will be inserted in its original size, so you will probably have to re-size it the same way you re-sized a text box. Click on the picture and note the circles at the corners and at the midpoints of the length and width. Move your mouse pointer over the circles, left-click the mouse and hold the button down. Move the mouse vertically or horizontally to re-size.

Rotating a picture: It is possible to rotate pictures in MS PowerPoint. Once a picture
has been inserted onto a slide and you have clicked on the picture so that it
is "outlined," notice the green circle above the center of the
picture.
Move the mouse pointer over the green circle, and left-click and hold the button down. Now move the mouse either clockwise or counter-clockwise and the picture will rotate in the same direction. When it is in the position you want, release the mouse button.
You can also add Charts and Graphs and Tables to your PowerPoint Presentation. It is similar to adding a picture, but you also have the have the data (information) ready to add in order to make it work. If you already have the chart or graph in another file (whether it be PowerPoint or Word or Excel or anything else), you can copy and paste it into your presentation. We will cover how to create a new Chart/Graph/Table in PowerPoint 102.
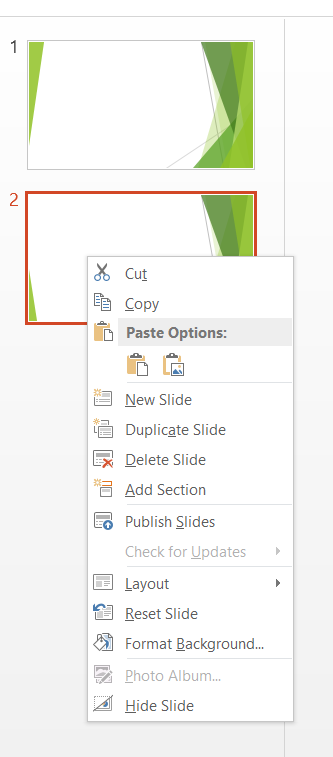
Slide Management
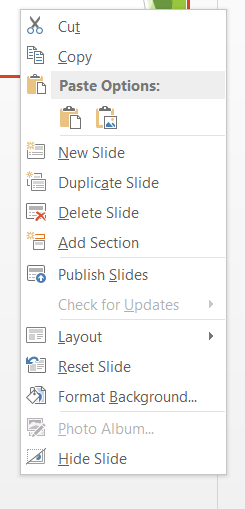
Once you have completed a slide, you can create a new slide by clicking on the New Slide icon. Notice that your previous slides still appear on the left-side frame. You can still access your previous slides by simply clicking on them from this location.
Once all your slides have been completed, you can present your slides in a "slideshow." From the Menu Bar select Slide Show ► View Show.
Notice that the slide takes over your entire screen. To navigate through the slides use the arrow keys on your keyboard (←, → or ↑, ↓). You can also navigate through your slides clicking on the left or right arrows in the lower left corner of your slide.
To end your slide show, click on the square box on the lower left side of your slideshow (this is difficult to see at first because it is designed to blend in to your slide show so it won't be noticeable to your audience). Select End Show from the pop-up window. Or, just press the “ESC” (Escape) key!
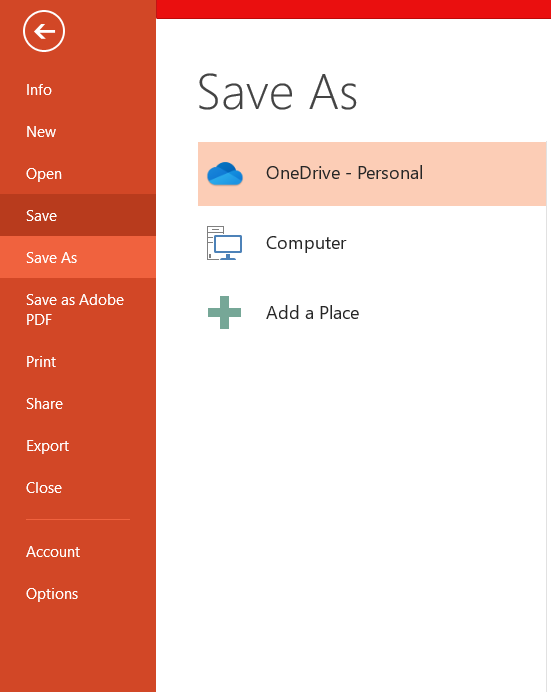
Saving Slide Shows
Save the file
When you come to a stopping point and want to leave the computer or close the program, it is important to save your work (even if you are printing a hard copy — saving should be a reflex).
Click ►File ►Save from the Menu Bar to get started.
You can change the filename that PowerPoint has chosen just by typing a new one in the File name box at the bottom of the window that appears.
MS PowerPoint will automatically save your document with the suffix “.ppt” – this is simply a tag that lets PowerPoint know that your work is specific to this program. You do not have to type it – just highlight what is there (default is “Presentation1”) and write a new file name. (If you are using the newest version of PowerPoint it will have the suffix “.pptx”)
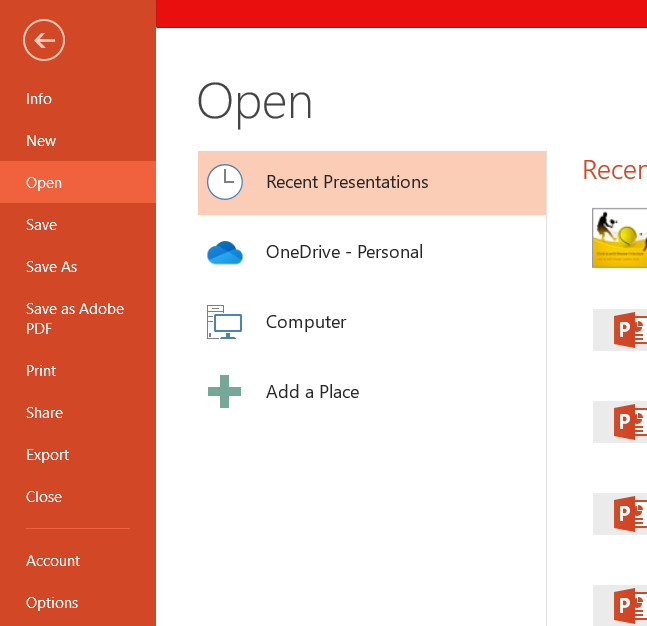
To bring a saved document back up on the screen from MS PowerPoint:
1. Click ►File ►Open from the Menu Bar.
2. Find where the file is located (which folder, that is) and click on the filename of the document you want.
3. Click ►Open.
Printing Slide Shows
To print your MS PowerPoint slides:
1. Click ►File ►Print from the Menu Bar and a Print window will pop up on the screen.
2. Click ►OK for your document to start printing.
As with all commands in MS PowerPoint, you can make changes along the way. From the Print menu, you can alter how many copies will be made, in what order the pages will be, and much more. You can choose to print a certain number of slides per page, or the outline, or even notes!
Finding Help
You can get help with MS PowerPoint by choosing Microsoft PowerPoint Help or Show the Office Assistant from the Help menu on the main menu bar.
Tutorials are also available on the Internet. Your instructor can help you with locating some of these resources.
MICROSOFT POWERPOINT
MS PowerPoint is a program that is included in the Microsoft Office suite. It is used to make presentations for personal and professional purposes.
- Given below are a few important things that one must know about the development and introduction of Microsoft PowerPoint:
- The program was created in a software company named Forethought, Inc. by Robert Gaskins and Dennis Austin.
- It was released on April 20, 1987, and after 3 months of its creation, it was acquired by Microsoft.
- The first version of this program, when introduced by Microsoft was MS PowerPoint 2.0 (1990).
- It is a presentation-based program that uses graphics, videos, etc. to make a presentation more interactive and interesting.
- The file extension of a saved Powerpoint presentation is “.ppt”.
- A PowerPoint presentation comprising slides and other features is also known as PPT.
Gradually, with each version, the program was more creative and more interactive. Various other features were added in PowerPoint which massively increased the requirement and use of this MS Office program.
Basics of MS PowerPoint
Discussed below are a few questions that one must be aware of while discussing the basics of MS PowerPoint. Once this is understood, using the program and analysing how to use it more creatively shall become easier.
Question: What is MS PowerPoint?
Answer: PowerPoint (PPT) is a powerful, easy-to-use presentation graphics software program that allows you to create professional-looking electronic slide shows.
Question: How to open MS PowerPoint on a personal computer?
Answer: Follow the steps below to open MS PowerPoint on a personal computer:
1. Click on the start button
2. Then choose “All Programs”
3. Next step is to select “MS Office”
4. Under MS Office, click on the “MS PowerPoint”
A blank presentation is open on the screen. According to the requirement, a person can modify the
template for a presentation and start using the program.
MICROSOFT POWERPOINT
Question: What is a PowerPoint presentation or PPT?
Answer: A combination of various slides depicting a graphical and visual interpretation of data, to present information in a more creative and interactive manner is called a PowerPoint presentation or PPT.
Question: What is a slide show in a PowerPoint presentation?
Answer: When all the slides of a PowerPoint presentation are set in series and then presented to a
group of people, where each slide appears one after the other, is a set pattern, this is known as a PowerPoint slide show.
Question: What all elements can be added to a slide?
Answer: The following elements can be added to a Powerpoint slide:
1. Clip Art
2. Graphs
3. Tables
4. Photographs
5. Charts
6. Media Clips
7. Videos
All these elements are mainly used to enhance presentation skills and make the slide more interactive.
Features of MS PowerPoint
There are multiple features that are available in MS PowerPoint which can customise and optimise a presentation. The same have been discussed below.
Slide Layout
Multiple options and layouts are available based on which a presentation can be created. This option is available under the “Home” section and one can select from the multiple layout options provided.
Insert – Clipart, Video, Audio, etc.
Under the “Insert” category, multiple options are available where one can choose what feature they want to insert in their presentation. This may include images, audio, video, header, footer, symbols, shapes, etc.
Slide Design
MS PowerPoint has various themes using which background colour and designs or textures can be added to a slide. This makes the presentation more colourful and attracts the attention of the people looking at it.
Transitions: – Slide Transitions show their relevance during the time of the slideshow. Slide transition is the type of entrance and exit effects that are allocated to every slide in the presentation. When you play the slideshow, each and every slide will come in with the entrance transition and move out with the exit
transition.
Some of the commonly applied transitions in the PowerPoint slides are Reveal, Cut, Diamond, Wipe, Uncover, Fade in and Fade Out.
Image Merging: – MS Powerpoint allows the user to add and upload multiple images at the same time to use on the slides. This feature means that you can overlap two or more pictures together in one position. It
is not only limited to the merging of images but shapes, smart art graphics, word art text, and everything.
Morph Transition: – This transition sets this application on top of beginner tools used for animators and VFX engineers across the globe. The seamless smooth transition between one slide to the other is what Morph is.
This feature can be added using the “Design” category mentioned on the homepage of MS PowerPoint. Although there are existing design templates available, in case someone wants to add
some new texture or colour, the option to customise the design is also available. Apart from this, slide designs can also be downloaded online.
Animations
During the slide show, the slides appear on the screen one after the other. In case, one wants to add some animations to the way in which a slide presents itself, they can refer to the “Animations” category.
Home
Firstly, in PowerPoint, there are slides. Users need to add content to them to make a presentation.
From the Home menu, users can add new slides, decide their sequence, layout, design & other word processing functions like font change, size change, etc. PowerPoint layout is used to change
the layout of the current slide.
Insert
From the Insert menu, the user can add media like pictures, symbols, audio, video, header, footer,
shapes, etc. to the slides to enhance the user’s presentation.
Design
The design menu offers the user with ready-made templates & background designs for slides that make the presentation look very attractive.
Slideshow
Finally, from the Slideshow menu, the user can view the final form of the slideshow. Users can start the slideshow from the first slide or the slide that users are editing. They can also set display time
for each slide from the ‘Slideshow’ menu.
Animations
During the slide show, the slides emerge on the screen one after the other. In case, one desires to add some animations to how a slide displays itself, they can refer to the “Animations” category.
Transition & Animation are the unique functions of PowerPoint. These menus offer different options in which the text appears on the slides & takes transitions from one slide to another.
With the Animation effect option, the animation effect is applied to the chosen content. Next with Custom Animation, different options will be provided for the animation effects like Entrance,
Emphasis, Exit, and Motion path.
Slide transition: This group consists of animation effects that are applied to complete slides.
During the slideshow, the slide begins as soon as it starts. This is termed the transition effect.
PowerPoint Template: Microsoft gives thousands of free, professionally outlined PowerPoint design templates. Several other sources of differing quality and prices are available online, as well.
Review tab The various tools that one can use under this tab are; Spelling, Research, Thesaurus, Translate, Language. The Research button aids in online research in books and Internet resources about a subject or topic you are working on.
Thesaurus tool lists words arranged together according to the similarity of meaning. By using Thesaurus in PowerPoint from the Review tab one can easily find synonyms for relative words in
the content.
Translate Language is employed to change the English language words to another language. Next, is the New Comment option which is used to write a comment text correlated to a word or sentence on a slide. This comment can be further edited by edit comment and can be deleted also.
Next is the Protect Presentation option by which the data of the presentation is protected with the application of a password, after which it cannot be changed.
View tab
In the View tab, a user can have a Normal View of a presentation. This is also called the default view. It consists of slides where one can add content for the presentation.
Next inline is the Slide Sorter View where all the slides of the presentation are displayed in small form on the screen.
With the Notes Page tool, the slide is presented with its notes. The presentation/slideshow/run full screen with animation effects is done with the Slide Show option.
The slide master is practiced in the presentation to attach content such as a picture at one go on all sides with the same slide layout. Similar to the slide master with the handout master, a user can add content such as text to all handouts on the handout page applied to print the slide.
Next is the Notes Master tool, using which one can write any common text on all the notes pages at once.
There are other tools like Show/Hide Group wherein the Ruler tool one can hide or show the ruler bar, similarly with the Grid-lines tool gridlines can be hidden or made visible.
A message Bar is used to show or hide messages. With the zoom option, the slide can be zoomed more or less. Next is the Macro tool with which any action can be recorded in the presentation.
Uses of PowerPoint Presentation PowerPoint presentations are useful for both personal and professional usage. Given below are a
few of the major fields where PPT is extremely useful:
Education – With e-learning and smart classes being chosen as a common mode of education today, powerPoint presentations can help in making education more interactive and attract students towards the modified version of studying
Marketing – In the field of marketing, PowerPoint presentations can be extremely important. Using graphs and charts, numbers can be shown more evidently and clearly which may be ignored by the viewer if being read
Business – To invite investors or to show the increase or decrease in profits, MS PowerPoint can be used
Creating Resumes – Digital resumes can be formed using MS PowerPoint. Different patterns, photograph, etc. can be added to the resume
Depicting Growth – Since both graphics and text can be added in a presentation, depicting the growth of a company, business, student’s marks, etc. is easier using PPT